My friend Gail from Weaver's Cupboard and I went to the February meeting of the Greater Los Angeles Spinners Guild (GLASG), where Gwen Powell gave a seminar on using the blending board and woolen spinning. Gwen has a Certificate of Excellence in Handspinning from the HGA and teaches spinning, weaving, crochet, and dyeing. She was instrumental in bringing back the garneting board from obscurity under the friendlier name "blending board." She worked with Clemes & Clemes on the design and the result is a board created with the fiber know-how of a master spinner and the craftsmanship of a major fiber tool maker. After seeing some of their boards in action I find them tempting but for the time being, I'm sticking with my less beautiful but fully functional handmade board.

Easy for her, that is. She has become so expert at using her blending board that she had it loaded with fiber and created rolags in just a minute or two.

I also put some inclusions in the purple/blue set, which mostly fell out later. But it was a lot of fun and I'm going to enjoy using this tool now that I have some clues about what can be done with it.

Yesterday, I had a few minutes to spin the rolags. I really tried to stick with the long-draw woolen technique Gwen showed, but I struggled. I think part (but not all) of the problem was the consistency of my rolags. Some parts drafted easily. Other parts required tugging to get any fibers out. And I kept catching myself reverting to my worsted style. Since my singles were so inconsistent, I decided to Navajo ply without regard to color to get a very chaotic yarn. I love how the colors turned out. Wonder what I can do with 18 yards of chaos?
Gwen will be giving a full workshop for my Saturday Spinners group in a couple of months and I'm really looking forward to learning more from her.
 One of my local guild's members sent out an email through the grapevine a couple of weeks ago about selling her Pat Green Triple Picker. Lucky for me, I check my email obsessively and was the first to respond to her message. As much as I like my Kaydessa box picker, I can prepare only a few ounces of fiber in an hour. While the Pat Green can go through several POUNDS of fiber in an hour. You can get an idea of its size from this photo -- the picker is sitting on a porch swing that seats two adults. I'm still keeping the Kaydessa -- it can go to workshops with me, but the Pat Green will be my go-to tool.
This picker needs a little attention -- it's a bit rusty and the wood needs some care, but for the price, I couldn't have been happier. A little elbow grease and it will be ready to go. And just in time. At the GLASG meeting, I won a bag full of unwashed alpaca. Looked pretty horrible, but after washing, it's a beautiful light fawn color. It was already a bit matted and washing matted it a little more, so it's going to need a ride through the picker before it can be carded.
Incidentally, I learned this last week:
(HOT CAR) + (UNWASHED ALPACA) X (2 DAYS) = (INSTANT NAUSEA)
Life is full of unexpected lessons.
Ever have one of those days where you couldn't do anything right? Friday I took another machine knitting class at Newton's Yarn Country. This session was on punch lace (aka thread lace) and using the lace carriage.
For the life of me, I couldn't even remember how to cast on. Had to sneak a peak at my instruction book because I wasn't going to admit it. And still had to ask for help. And at one critical point, I ran the carriage over the bed without adding a necessary thread and got to learn how to manually pick up and re-knit dropped stitches.
 Unfortunately, I didn't think to have Newton's check out my lace carriage in advance. It was skipping stitches and knitting some in unintended places, so I left it to get some TLC. The punch lace, though, was pretty easy to do and I also learned a new binding off technique. Here I'm in the process of binding off a swatch.
I'm not sure what I would use it for, but this technique makes an interesting textured fabric with the heavy yarn overlaid by a lightweight thread.

I read somewhere that there really isn't a right or wrong side in punch lace - you choose based on what's pleasing to your eye - but I don't think there's any question here that this is the wrong side.
 And this is the knit side. Still don't like the overall pattern, but I like the look of the lacy thread over the heavier yarn. We used a dark thread over a medium toned yarn to get some contrast between the two. I think this would look interesting (in the right pattern) with a metallic thread or perhaps a different tone of the same color.
Close-up, you can see how the yarn and thread are knitted together.
I also learned to do a hem with a picot edge. I think it makes a really pretty border.
 |
Saturday was the Griffin Dyeworks Fiber Frolic. This is an annual (I think) event held in Monrovia, where they offer a number of classes, have a small vendor hall, and a spinning circle. The Griffin people were super friendly and made it a fun day.
My morning class was on fiber blending with Micki Lawrence from Funhouse Fibers. Micki sells her handspun yarn and dyed roving on her site. I already knew Micki a little from GLASG, and expected her to lead a lively and fun class. She did not disappoint. Even though she was a last minute replacement for the original teacher, she was well-prepared and I would take another class with her anytime.
Using just the three primary colors (red, yellow, and blue) and a pair of hand carders, we worked on creating a color wheel by blending different proportions of the colors. Then created tints by adding white to each color, and shades by adding black. Aha moment for me. I have to admit I'm intimidated by color theory. I know what pleases me and I know what I definitely don't like. I tend to stick to a few "safe" color choices. But I finally got it that by blending a color that I don't particularly like with a different color, I can create the illusion of an altogether different color. And I really like the texture created by combining two colors.
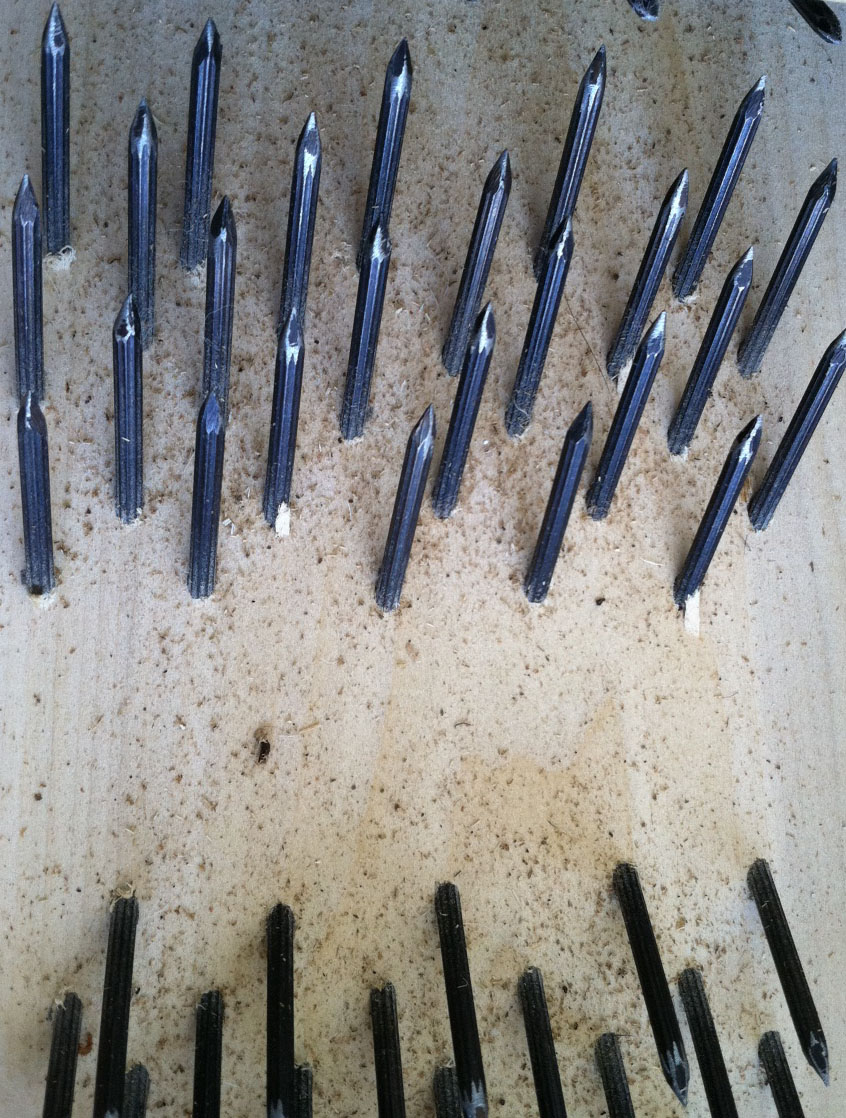
 Micki also demonstrated using a DIY hackle to blend color. Although we ran out of time and didn't get to play with them, she had brought along enough of her handmade hackles for each of us to use, and we were able to buy them. These are made by attaching some plastic hairpicks to a board. Simple. But having drilled through plastic in the past, visions of massive hand injuries made me take no time to decide to buy one. I'm pretty sure nearly everyone in the class bought one as well.
 Speaking of buying things, there were shopping opportunities here. Ruth from the Dizzy Ewe was there with piles of her gorgeous fibers. I purchased some lovely cream-colored Polwarth top from her for my afternoon class.
 One of the vendors was selling gently used books and I found a copy of Yarns to Dye For. It explains how to achieve different patterning effects such as stripes and faux fairisle in hand-dyed yarns. Having done a fair amount of dyeing using different techniques, I think book is excellent for the crafter who doesn't want to become an expert dyer or invest in expensive equipment, but who still wants to control where color goes in the yarn. Instructions are very clear and uncomplicated. Think my next solo dyeing project will be "watermelon" stripes.
 At the Griffin Dyeworks tables, I bought a small bag of cochineal and made myself walk away. ( It's now triple-bagged and in my studio.) Fifteen minutes later, when a friend showed me a handheld tapestry loom she had bought, I was forced to go back for another look. And made a trip to my car with:
 Not one, but two tapestry looms made by Jim Hokett of Hokett Would Works. Yes, Would. The first time I saw the name, I thought it was a typo but it turns out to be a pretty clever play on words. The larger loom is 12:"x16" and is made of purple heart and padauk. The smaller one is 7"x8" and is made of pecana (sic) negra and coyote wood. I wish I could take better photos because this one does not do justice to the lovely wood. Jim Hokett doesn't have his own website but his tools are sold by several fiber companies, including Griffin Dyeworks.
 These looms are warped by running a thread across the length, through the first notch, and back through the second one. I'm told that the finished product can be removed from the loom by just pushing the warp threads up the notches. Can't picture how that would work if there's enough tension on the warp but guess I'll just have to see.
Here you can see the loom partially warped. Below are sections of the front showing threads alternately going into or coming out of each slot, and the back, showing how the threads are wrapped around every other peg.


 Then I found this tiny tool called a barb beater. It's just 1"x2.5" - a perfect size for working with small areas on one of these handheld looms. Also made by Jim Hokett.
Finally, I fell for this beautiful nostepinne made of mahogany and poplar. This is used for winding yarn into a ball. Who could resist this lovely tool? I don't know who made this one.

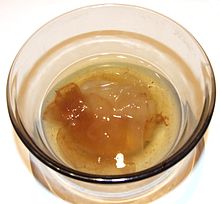
 My afternoon class was on dust dyeing, taught by Elena Dent. I love, love, love any form of dyeing. And Elena made it very simple. She had a dozen or so different salt shakers filled with Cushings dyes cut with cornstarch and a pair of commercial steam table pans filled with hot (not boiling) water simmering on the stove. We added some vinegar to the water, put in a piece or two of fiber, and started sprinkling them with the dye powders.
Elena was knowledgeable and informative, and did a good job taking the mystery out of the process for the class. Only thing I would change is to have a monitor to make sure people took turns nicely. The pans were large enough for two people at a time to share one. Most of my classmates were considerate, but we had one person who shoved her way in front, and filled one pan with her fibers. Then took that batch out and started another before anyone else had a turn. At one point she had one entire pan filled along with half of the other while the rest of us waited our turns. And of course we were all too polite to say anything to her. Maybe drawing numbers would have helped. But I don't think anyone let this ruin the class for them, and I would definitely take another class from Elena.
 Some people mixed the colors in the pan and ended up with fairly monochromatic results. One of the women had some silk scarves that she slowly dipped in the pan repeatedly, and ended up with some lovely ombre effects. I wanted multi-hued fibers, so I sprinkled several different colors on my roving. I tried not to agitate the water, so the colors would pretty much stay where sprinkled. This is the first time I've done dyeing where the result was pretty close to what I was trying for.
Despite the care we took, somewhere in the process I managed to felt the fibers a little. But I'm going to spin this if I have to card it again! I'm so curious to see what the colors do when spun.
All in all, it was a great day and I look forward to going again.


